Why Quarkus Starts So Fast — A Pizza Analogy

If you’ve ever wondered why Quarkus applications start almost instantly while traditional Spring Boot apps take their time warming up, here’s a tasty way to understand it — through pizza

The Traditional Spring Boot Chef

Picture an old-school Italian chef.
When you order a pizza, he starts from scratch — fetching ingredients, chopping vegetables, kneading the dough, spreading the sauce, adding toppings, and then baking it.
The result is delicious, but it takes time before the first slice reaches your plate.

The Modern Quarkus Chef

Now imagine a modern, efficient chef.
Before the restaurant even opens, he’s already prepared the dough, chopped the veggies, and preheated the oven.
So when you order, he just assembles the pizza and slides it in. A few minutes later — done! Hot, fresh, and ready to serve.

The Tech Behind the Taste

That’s exactly how Quarkus achieves its lightning-fast startup.
Traditional frameworks like Spring Boot do most of their setup at runtime — scanning classes, wiring dependencies, and loading configurations when the app starts.
Quarkus, on the other hand, does that heavy lifting ahead of time during the build phase — a process known as build-time initialization.
By the time your application runs, everything is already prepared — like that Quarkus chef with his toppings ready to go.

The Result

  • Faster startup time (perfect for serverless and cloud environments)
  • Lower memory usage
  • Instant readiness — your app serves requests as soon as it wakes up

Final Slice

So next time someone asks why Quarkus feels so fast, tell them it’s not magic — it’s just smart preparation.
Quarkus is the chef who does the work before the customer walks in, while others are still chopping tomatoes.

Understanding Java Streams and Parallel Execution: A Case Study

Introduction

Java Streams provide a powerful abstraction for processing collections of data. With the introduction of parallel streams, it became easier to write parallelized code for better performance, especially for computationally intensive or I/O-bound tasks. However, understanding how streams and parallelism work under the hood is crucial to use them effectively.

In this blog, I’ll share a real-world scenario where incorrect usage of Stream.parallel() led to unexpected results, and how we corrected it for optimal performance.

The Problematic Code

Here’s the initial implementation, where the goal was to fetch interactions from multiple repositories in parallel:

public class FetchInteractionsServiceFout {
    private final IVRInteractionRepository ivrInteractionRepository;
    private final WebInteractionRepository webInteractionRepository;
    private final AppInteractionRepository appInteractionRepository;

    public FetchInteractionsServiceFout(IVRInteractionRepository ivrInteractionRepository,
                                        WebInteractionRepository webInteractionRepository,
                                        AppInteractionRepository appInteractionRepository) {
        this.ivrInteractionRepository = ivrInteractionRepository;
        this.webInteractionRepository = webInteractionRepository;
        this.appInteractionRepository = appInteractionRepository;
    }

    public List<Interaction> fetchInteractions(List<InteractionType> interactionTypes) {
        return Stream.of(
                        interactionTypes.contains(InteractionType.IVR) ? faultSafe(ivrInteractionRepository::fetchInteractions) : Stream.<Interaction>of(),
                        interactionTypes.contains(InteractionType.WEB) ? faultSafe(webInteractionRepository::fetchInteractions) : Stream.<Interaction>of(),
                        interactionTypes.contains(InteractionType.APP) ? faultSafe(appInteractionRepository::fetchInteractions) : Stream.<Interaction>of())
                .parallel()
                .flatMap(s -> s)
                .toList();
    }

    private Stream<Interaction> faultSafe(Supplier<Stream<Interaction>> supplier) {
        try {
            return supplier.get();
        } catch (RuntimeException e) {
            return Stream.of();
        }
    }
}

Observations

  • Expectation: The method should fetch interactions from all repositories in parallel.
  • Reality: Upon inspecting the thread names, the calls were made sequentially, not in parallel.

Root Cause

The issue arises because stream creation is inherently sequential, and parallelism only applies to operations within the stream pipeline after the .parallel() call. In the problematic code:

  1. The streams were created using Stream.of(...).
  2. The heavy operations (fetchInteractions) were executed during stream creation, before parallelism was applied.
  3. The .parallel() and subsequent operations like flatMap only processed the already-constructed streams, leaving no heavy operations to parallelize.

The Correct Approach

To ensure that the network calls were made in parallel, the logic was refactored to defer the heavy operations into the stream pipeline, ensuring they benefit from parallelism:

public class FetchInteractionsServiceKlopt {
    private final IVRInteractionRepository ivrInteractionRepository;
    private final WebInteractionRepository webInteractionRepository;
    private final AppInteractionRepository appInteractionRepository;

    public FetchInteractionsServiceKlopt(IVRInteractionRepository ivrInteractionRepository,
                                         WebInteractionRepository webInteractionRepository,
                                         AppInteractionRepository appInteractionRepository) {
        this.ivrInteractionRepository = ivrInteractionRepository;
        this.webInteractionRepository = webInteractionRepository;
        this.appInteractionRepository = appInteractionRepository;
    }

    public List<Interaction> fetchInteractions(List<InteractionType> interactionTypes) {
        return interactionTypes.stream()
                .parallel()
                .flatMap(interactionType ->
                        faultSafe(() -> switch (interactionType) {
                            case IVR -> ivrInteractionRepository.fetchInteractions();
                            case WEB -> webInteractionRepository.fetchInteractions();
                            case APP -> appInteractionRepository.fetchInteractions();
                        }))
                .toList();
    }

    private Stream<Interaction> faultSafe(Supplier<Stream<Interaction>> supplier) {
        try {
            return supplier.get();
        } catch (RuntimeException e) {
            return Stream.of();
        }
    }
}

Key Changes

  1. Defer Heavy Operations to the Pipeline:
    • The repository calls (fetchInteractions) were moved to the flatMap operation, which is part of the pipeline.
  2. Parallelism Placement:
    • The .parallel() call ensures that each interactionType is processed concurrently.
  3. Lazy Evaluation:
    • Heavy operations are triggered only when the terminal operation (toList) executes the pipeline, ensuring they benefit from parallelism.

Why the Correct Code Works

Stream Creation vs. Stream Operations

  1. Stream Creation:
    • In the problematic code, the streams were created using Stream.of(...), and the heavy operations (fetchInteractions) were executed before the .parallel() call.
    • Stream creation is always sequential, so the network calls were made sequentially.
  2. Stream Operations:
    • In the correct code, .parallel() is applied to the interactionTypes.stream(), and the heavy operations (fetchInteractions) are part of the flatMap operation within the parallelized pipeline.
    • This ensures that the heavy operations are distributed across threads in the ForkJoinPool.

How Parallel Streams Work

  • Parallelism Scope: Parallelism applies only to the operations after .parallel() in the stream pipeline.
  • Lazy Evaluation: Streams are lazily evaluated. Operations like flatMap or map execute only when a terminal operation (e.g., toList) is invoked.
  • ForkJoinPool: Parallel streams use the common ForkJoinPool to split and process tasks concurrently. The tasks are distributed based on the pool’s parallelism level.

Lessons Learned

  1. Stream Creation Is Sequential:
    • The creation of a stream (e.g., using Stream.of(...)) does not involve parallelism.
  2. Defer Heavy Operations:
    • Place heavy or time-consuming operations (e.g., network calls) inside the stream pipeline to benefit from parallelism.
  3. Parallelism Placement Matters:
    • Apply .parallel() at the right point in the stream pipeline to ensure operations run concurrently.
  4. Verify Parallel Execution:
    • Use tools or logs (Thread.currentThread().getName()) to ensure tasks are distributed across threads as expected.

Exploring Java 23

Java 23 brings couple of new features to developers, most of which are still in preview, allowing us to test them before they are officially adopted. This blog will walk you through some of these features, highlighting the potential improvements and how they can simplify our day-to-day coding experience. Don’t forget, to compile and run these features, you need to use the --enable-preview flag.

Let’s dive in!

Feature 1: Markdown in JavaDoc – JEP 467

Traditionally we have been using HTML to format JavaDoc comments. But now, with Java 23, we can use Markdown to write JavaDoc comments. This allows developers to format and style JavaDoc comments more efficiently with less verbosity.

To use Markdown, we should start all lines of JavaDoc comment with three slashes. For example

/// **Calculate Square**
/// This method calculates the square of a given number.
///
/// **Parameter:**
/// - `number`: The number to be squared.
///
/// **Returns:**  
/// The square of the provided number.

int calculateSquare(int number) {
    return number * number;
}

Feature 2: Import an entire module (Preview) – JEP 476

One of the new features in Java 23 is the ability to import an entire java module. Traditionally, you would have to import each required package or class explicitly (except java.lang). Now, with this module-wide import, all classes from a module are available without needing individual imports.

For example, we can import the complete java.base module and use classes from this module (like List, Map, Collectors, etc) without needing individual imports.

import module java.base;
...
List<String> names = List.of("John", "Jennie", "Jim", "Jack", "Joe");

Class Name Ambiguity

If two imported modules have the same class name, then compilation results in error. For example, class Date is present in both java.base and java.sql. So if you import both modules, it results in compilation error. To resolve the compilation error, import the desired Date class with package name.

import module java.base;
import module java.sql;

import java.util.Date; //removal of this import results in compilation error

Date date = new Date(); 

Feature 3: Primitive Types in Patterns, instanceof and switch (Preview) – JEP 455

So far, instanceof works well with object and not all with primitives. And switch works well with objects and to some extend with primitives. With Java 23, all primitive types can now also be used in pattern matching – both in instanceof and switch

long y = 100;
if (y instanceof short s) {
    println(s + " is a short");
}

double value = ...
switch (value) {
  case byte   b -> println(value + " instanceof byte:   " + b);
  case short  s -> println(value + " instanceof short:  " + s);
}

Apart from these features, several preview and incubator features are presented again in Java-23 with no/minor changes. Few of them worth mentioning

  • Flexible Constructor Bodies (Second Preview) – JEP 482
  • Stream Gatherers (Second Preview) – JEP 473
  • Implicitly Declared Classes and Instance Main Methods (Third Preview) – JEP 477
  • Structured Concurrency (Third Preview) – JEP 480
  • Scoped Values (Third Preview) – JEP 481

From WAR to Cloud: The Evolution of Java Deployment

Introduction

The deployment of Java applications has evolved significantly from traditional methods using WAR and EAR files to leveraging modern technologies like Docker and cloud platforms. This post explores this transformation and further delves into the roles of Kubernetes and OpenShift in modernizing deployment infrastructures.

Basics of WAR and EAR Files

In traditional Java environments, applications were packaged into Web Application Archives (WAR) for web modules and Enterprise Application Archives (EAR) for enterprise applications. These packages were deployed manually on servers like Apache Tomcat or IBM WebSphere, often leading to the “it works on my machine” problem due to environmental discrepancies.

Deployment Process

This traditional approach required extensive manual effort in managing servers, configuring applications, and maintaining security, making the process cumbersome and error-prone.

Transition to Containerization with Docker

Introduction to Docker

The introduction of Docker revolutionized the deployment of applications by using containers. Containers package the application and its dependencies into a single runnable unit, ensuring consistency across environments, which mitigates compatibility issues and simplifies developer workflows.

Java Applications in Docker

For Java applications, Docker allows developers to define their environment through a Dockerfile, specifying everything from the Java version, web/application server version, fonts, other dependencies. This file creates an image that can be deployed anywhere Docker is installed, reducing the overhead of traditional deployment and increasing deployment speed significantly.

Moving to the Cloud

Cloud Deployment Models

With the advent of cloud computing, deployment strategies have evolved into models like Infrastructure as a Service (IaaS), Platform as a Service (PaaS), and Software as a Service (SaaS). These models offer varying levels of control, flexibility, and management, tailored to different business needs.

Direct Container Deployment

One of the key advantages of containerization with Docker is the ability to take a Docker container or image and directly deploy it to a cloud platform. This approach simplifies the migration process and ensures that the application runs the same way it does in your local environment, regardless of the cloud provider.

Container-Ready Cloud Services: Major cloud providers like AWS, Azure, and Google Cloud offer services specifically designed to host containerized applications. For instance:

  • AWS Elastic Container Service (ECS) and AWS Elastic Kubernetes Service (EKS) support Docker and allow you to run containers at scale.
  • Azure Container Instances (ACI) and Azure Kubernetes Service (AKS) provide similar functionalities, facilitating easy deployment and management of containers on Azure.
  • Google Kubernetes Engine (GKE): Specializes in running Docker containers and offers deep integration with Google Cloud’s services, making it ideal for complex deployments that require orchestration.
  • Google Cloud Run: A fully managed platform that lets you run stateless containers, invocable via web requests or Pub/Sub events. It combines the simplicity of serverless computing with the flexibility of containerization, automatically scaling based on traffic, and billing only for the resources used during execution.

Java in the Cloud

Using cloud platforms, Java developers can drastically reduce the overhead associated with infrastructure management. Services like AWS Elastic Beanstalk, Azure App Services, and Google App Engine automate deployment, scaling, and maintenance, allowing developers to concentrate on their core application logic.

Advanced Container Orchestration with Kubernetes and OpenShift

Kubernetes: The Container Orchestrator

Kubernetes is an open-source platform designed to automate the deployment, scaling, and operation of application containers across clusters of hosts. It helps manage containerized applications more efficiently with features like:

  • Pods: The smallest deployable units created and managed by Kubernetes.
  • Service Discovery and Load Balancing: Kubernetes can expose a container using the DNS name or its own IP address. If traffic to a container is high, Kubernetes is able to load balance and distribute the network traffic.
  • Storage Orchestration: Kubernetes allows you to automatically mount a storage system of your choice, whether from local storage, a public cloud provider, or a network storage system.

OpenShift: Enterprise Kubernetes

OpenShift is a Kubernetes distribution from Red Hat, designed for enterprise applications. OpenShift extends Kubernetes with additional features to enhance developer productivity and promote innovation:

  • Developer and Operational Centric Tools: OpenShift provides a robust suite of tools for developers and IT operations, enhancing productivity and promoting a DevOps culture.
  • Enhanced Security: Offers more secure default settings and integrates with enterprise security standards.
  • Build and Deployment Automation: Facilitates continuous integration (CI) and continuous deployment (CD) pipelines directly within the platform.

Best Practices and Future Trends

Best Practices

For successful cloud and container orchestration deployments, integrate CI/CD pipelines, employ effective monitoring and logging, and adopt a microservices architecture.

Future Trends

The future points towards even more automated solutions like serverless computing, with Kubernetes and AI-driven tools driving smarter deployment strategies.

Conclusion

The evolution from traditional WAR and EAR deployments to using Docker, Kubernetes, and OpenShift reflects the dynamic nature of software development, offering more scalable, efficient, and reliable deployment options.

Humanity to Labels

When I first formed, I was nothing more than a clot of blood with a tiny heartbeat, a product of the fusion of two microbes. This beginning marked my entry into the broad classification of species known as “Humans.” As time progressed, certain physical attributes began to define me, placing me within the societal circle of “Gender.”

As I prepared to enter the world, more circles were drawn around me, ones of “Region,” “Religion,” “Caste,” and “Creed.” These labels were waiting to define and confine me in various ways.

Now, having grown older and wiser, the microbes within me yearn for a return to that broader identity of simply being “Human.” But the circles that were drawn around me have grown unbreakable, stifling, and so rigid that they suffocate, robbing me of my breath.

From a humble clot of life, a tiny heartbeat born,
Merged from two microbes, in humanity’s form.
Days unfolded gently, revealing nature’s plan,
Assigned a gender, part of nature’s grand span.

The world awaited eagerly, for my arrival’s grace,
To wrap me in circles, defining my place.
Regions, religions, castes, and creeds,
Labels and circles, like unyielding seeds.

Now, aged and wise, with a soul grown deep,
The microbes within yearn for a leap.
Back to the circle broad, where we all belong,
In the human fold, both vast and strong.

Yet, the circles cast around me, tough as they seem,
Have grown too rigid, like a stifling dream.
Unbreakable, unyielding, they constrict and bind,
Suffocating the spirit, leaving breath behind.

In these confines, I search for air,
Longing to shed these layers, so bare.
To breathe again in the circle wide,
Where just being human is enough, inside.

Rethinking Cloud Expenditure: An Eco-Friendly and Economic Perspective

In today’s era of rapid digitalization, cloud computing is no less than a boon. Companies, irrespective of their size, have taken to the cloud, benefiting from its scalability, accessibility, and reduced infrastructural costs. However, like every boon, there’s a side to it that we must reconsider: our cloud expenditure and its broader implications on the environment and economy.

1. The Environmental Stakes of Cloud Computing

When we talk about cloud, it’s easy to forget the very tangible, physical resources that power these virtual services. Every piece of data stored, every API hit, every server running in the background contributes to the power consumption.

Proverb to ponder: “Take only what you need and leave the rest.”

Question to ask: Why does a company need servers running during non-prod, non-working hours? If the answer is inertia or “just in case,” then it’s time to reconsider.

Data point: According to the U.S. Department of Energy, data centers account for about 2% of the nation’s electricity use. By optimizing server usage, we could significantly reduce this number.

2. The Economic Cost of Over-Provisioning

Beyond the environmental implications, there’s also the sheer cost of running these servers.

Question to ask: Why does a company need a dedicated server running 24/7 for APIs that receive only a few hundred requests a day?

Over-provisioning servers, especially when there’s minimal traffic, is an expense that many businesses can trim down. By transitioning to pay-as-you-go services or optimizing server usage based on demand, companies can save substantially.

3. The Financial Disparity in the Digital Age

When discussing the cloud, the conversation inevitably circles back to the giants that dominate this space. These corporations have indeed provided revolutionary services. But with every payment to them, the wealth gap between the richest and the poorest continues to widen.

Proverb to ponder: “A penny saved is a penny earned.”

Data point: In 2021, just five tech companies – Apple, Microsoft, Amazon, Alphabet (Google), and Facebook – held combined market capitalizations greater than the GDP of many countries. By rethinking our cloud expenditures, we’re not just saving money – we’re also taking a stand against disproportionate wealth accumulation.

In Conclusion: A Call to Action

Rethinking cloud expenditure isn’t merely about cutting costs. It’s about understanding the broader implications of our decisions – from the environment to the economy. As companies, and as individuals, it’s our responsibility to make choices that are not only financially prudent but also ethically sound.

In the ever-evolving world of technology, being aware, informed, and proactive can make all the difference. Let’s ensure that our journey to the cloud is not just efficient, but also conscious of the footprints we leave behind.

The Art of Gratitude: A Lesson Learned

It was a busy morning when I found myself rushing to the office, my mind racing with deadlines and tasks. The city streets were alive with the sound of traffic, as people hurried to their destinations, lost in their own thoughts. Amidst the chaos, I approached a rumble strip on the road, my attention divided between the buzzing of my phone and the hum of the cars around me.

Suddenly, a car stopped in front of me, the screech of its brakes pulling me back to reality. At first, I was confused. Why had the car stopped? Was there an accident? But then I noticed the driver motioning for me to cross the road.

As I crossed the road, the driver honked their horn, demanding that I thank them for letting me pass.

“Excuse me?” I said, turning around to face the driver.

“I stopped to let you cross the road, and you didn’t even thank me!” the driver exclaimed.

“Oh, I’m sorry,” I replied, taken aback. “I didn’t realize you were doing me a favor. But thank you for stopping your car. I appreciate it.”

The driver’s expression softened, and they nodded in response. Perhaps they had just wanted to be acknowledged for their act of kindness, and my words had given them that validation.

In the end, the driver’s demand for thanks may have come across as entitled and rude, but it served as a powerful reminder of the value of gratitude. We should always strive to be grateful for the kindness of others, and to express our gratitude in ways that honor the art of giving and receiving.

Create an AWS Lambda API to extract information from PDF

If you have not created an AWS lambda yet please feel free to follow my previous post to create your first hello world lambda using quarkus and Java.

In this post, I will share information about how to extract data from PDFs (especially receipts or invoices) using Amazon Textract service.

Here is my requirement – If I upload an invoice or receipt PDF to the application endpoint, it should return an Expense Json (in the below format) with details filled in. The endpoint should also save the uploaded pdf to S3 for future reference.

{
  "description" : "string",
  "amountWithTax" : 11000.11,
  "taxAmount" : 122.23,
  "receiptDate" : "10-10-2021",
  "documentUrl" : "fileName.pdf"
}

To start with, we need an endpoint to which a pdf file can be uploaded. I have created a controller with an endpoint for the same here. The controller just receives multipart form data and delegates the input to DocumeUploadService

@Path("/pdf")
public class PdfUploadResource {

    @Inject
    DocumentUploadService documentUploadService;

    @POST
    @Path("/upload")
    @Consumes(MediaType.MULTIPART_FORM_DATA)
    public Response upload(@MultipartForm MultipartFormDataInput input) {
        return Response.ok().
                entity(documentUploadService.uploadFile(input)).build();
    }


}

To use multipartform in the controller, we have to include the following dependency in our pom.xml

<dependency>
    <groupId>io.quarkus</groupId>
    <artifactId>quarkus-resteasy-multipart</artifactId>
</dependency>

DocumentUploadService just uploads the pdf to S3 using AWSS3Service and invokes ExpenseAnalyserService to analyse the document and find the text from the document.

@ApplicationScoped
public class DocumentUploadService {

    @Inject
    AwsS3Service awsS3Service;

    @Inject
    ExpenseAnalyserService expenseAnalyserService;

    @SneakyThrows
    public Expense analyseDocument(MultipartFormDataInput input) {
        for (InputPart inputPart : input.getFormDataMap().get("file")) {
            String documentUrl = uploadFile(inputPart);
            return expenseAnalyserService.analyseDocument(documentUrl);
        }
        return null;
    }

    private String uploadFile(InputPart inputPart) throws IOException {
        InputStream inputStream = inputPart.getBody(InputStream.class, null);
        String fileName = getFileName(inputPart.getHeaders());
        writeFile(inputStream, fileName);
        return fileName;
    }

    private void writeFile(InputStream inputStream,String fileName)
            throws IOException {
        byte[] bytes = IOUtils.toByteArray(inputStream);
        awsS3Service.saveFile(fileName, bytes);
    }
}

The main part here is ExpenseAnalyserService. To use amazon Textract service, first we have to add amazon textract sdk to our pom.xml.

        <dependency>
            <groupId>software.amazon.awssdk</groupId>
            <artifactId>textract</artifactId>
            <version>${textract.version}</version>
        </dependency>

Here I am using AnalyseExpense API which is more appropriate for invoice and receipt documents.


import software.amazon.awssdk.http.urlconnection.UrlConnectionHttpClient;
import software.amazon.awssdk.regions.Region;
import software.amazon.awssdk.services.textract.TextractClient;
import software.amazon.awssdk.services.textract.model.AnalyzeExpenseRequest;
import software.amazon.awssdk.services.textract.model.AnalyzeExpenseResponse;
import software.amazon.awssdk.services.textract.model.Document;
import software.amazon.awssdk.services.textract.model.S3Object;

import javax.enterprise.context.ApplicationScoped;
import java.math.BigDecimal;
import java.time.LocalDate;
import java.util.Collection;
import java.util.Comparator;
import java.util.Optional;

@ApplicationScoped
public class ExpenseAnalyserService {
    private static final Logger LOG = Logger.getLogger(ExpenseAnalyserService.class);

    public Expense analyseDocument(String uploadFileName) {
        TextractClient textractclient = TextractClient.builder()
                .httpClientBuilder(UrlConnectionHttpClient.builder())
                .region(Region.US_EAST_1).build();

        AnalyzeExpenseResponse result = textractclient.analyzeExpense(
                analyseExpenseRequest(uploadFileName));

        return Expense.builder()
                .amountWithTax(total(result).orElse(BigDecimal.ZERO))
                .documentUrl(uploadFileName)
                .build();
    }

    private AnalyzeExpenseRequest analyseExpenseRequest(String uploadFileName) {
        return AnalyzeExpenseRequest.builder()
                .document(
                        Document.builder().s3Object(S3Object.builder().name(uploadFileName)
                                .bucket(System.getenv("INVOICE_PDF_BUCKET_NAME")).build()).build())
                .build();
    }

    private Optional<BigDecimal> total(AnalyzeExpenseResponse result) {
        try {
            return result.expenseDocuments().stream()
                    .map(expenseDocument -> expenseDocument.summaryFields())
                    .flatMap(Collection::stream)
                    .filter(expenseField -> expenseField.type().text().equalsIgnoreCase("TOTAL"))
                    .filter(expenseField -> expenseField.type().confidence() > 80)
                    .max(Comparator.comparing(expenseField -> expenseField.type().confidence()))
                    .map(expenseField -> expenseField.valueDetection().text())
                    .map(BigDecimal::new);
        } catch (Exception e) {
            LOG.error("Error while analysing expense total", e);
            return Optional.empty();
        }
    }
    
}

AnalyseExpense API analyses the document and returns an object which contains information about all fields that it could identify. Every field identified by textract comes together with a confidence value.

To find the most correct value, it’s better to find the field with the maximum confidence value. For invoice total, the field returned from AWS Textract was “TOTAL“.

There are many other fields that can be extracted from the invoice.

- INVOICE_RECEIPT_ID - indicating the invoice id
- INVOICE_RECEIPT_DATE - indicating invoice date
- TAX - indicating the total tax in invoice
- VENDOR_NAME - indicating the vendor
- DUE_DATE - indicating invoice due date
- ITEM - indicating each item in the invoice
- QUANTITY - indicating quantity of each item in the invoice
- PRICE - indicating price of each item in the invoice

Important: It is very important that you have appropriate user rights to use the Textract APIS. Since I am using AWS SAM for my lambda here, providing the necessary privilege is just addition of one more policy (TextractPolicy) in my sam.yaml file.

Setting up a simple AWS Lambda build pipeline

Step-1: From AWS console, go to “CodeBuild” -> “Build” -> “Create build project”

Step-2: Add a project name and choose your source code repository. Here I have chosen my public repository, you may choose your own private repository.

Step-3: Fill in environment details. If you are building a native image using container build, make sure that you choose Privileged – “Enable this flag if you want to build Docker images or want your builds to get elevated privileges”

(Only for native images) To build native image, you will need more resources. Go to Additional configuration and choose more resources needed for your native build. Caution: More resources costs more money, so be sure that you are aware of the pricing model before you choose more resources.

Step-4: Choose a build spec. You can choose either a buildspec file or build commands. If you choose buildspec file, make sure that your source code has a buildspec.yml file

A sample buildspec yml content.

version: 0.2
phases:
  build:
    commands:
      - mvn package -Dnative -Dquarkus.native.container-build=true
      - sam build -t sam.native.yaml
      - sam deploy --config-file samconfig.toml --no-confirm-changeset --no-fail-on-empty-changeset

Important: The above buildspec does a deploy as well which is not the right thing to do especially when you have to deploy in to multiple environments like staging and production. Normally you should install the artifacts to an artifacts repository and create a code pipeline to deploy to different environments (I will cover it in a future post).

Also note that my buildspec refers to a samconfig.toml that was generated using sam guided deployment (sam deploy –guided).

If you prefer to deploy as part of this build project, make sure to add your AWS credentials as parameters in additional configuration

Enable Cloud Watch Logs or S3 Logs to see the build logs

Step-5: Now create build project and start build. Wish you a successful build.

Supersonic Java Lambdas using Quarkus

For people not interested in reading the prose, here is the complete source code. The source code contains an AWS lambda function to generate a PDF out of a HTML template.

Introduction

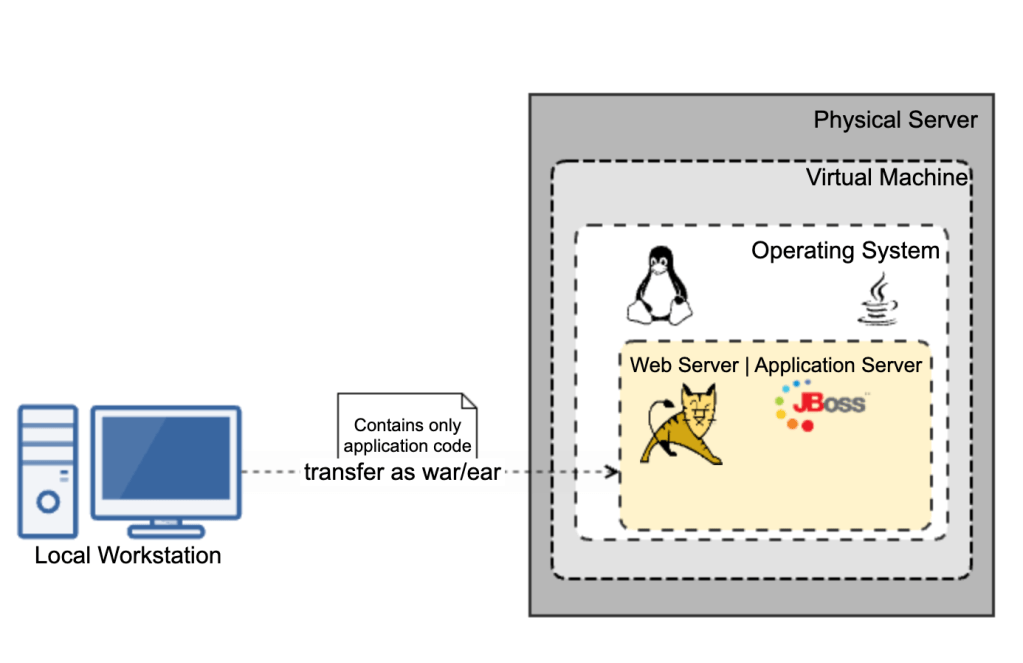
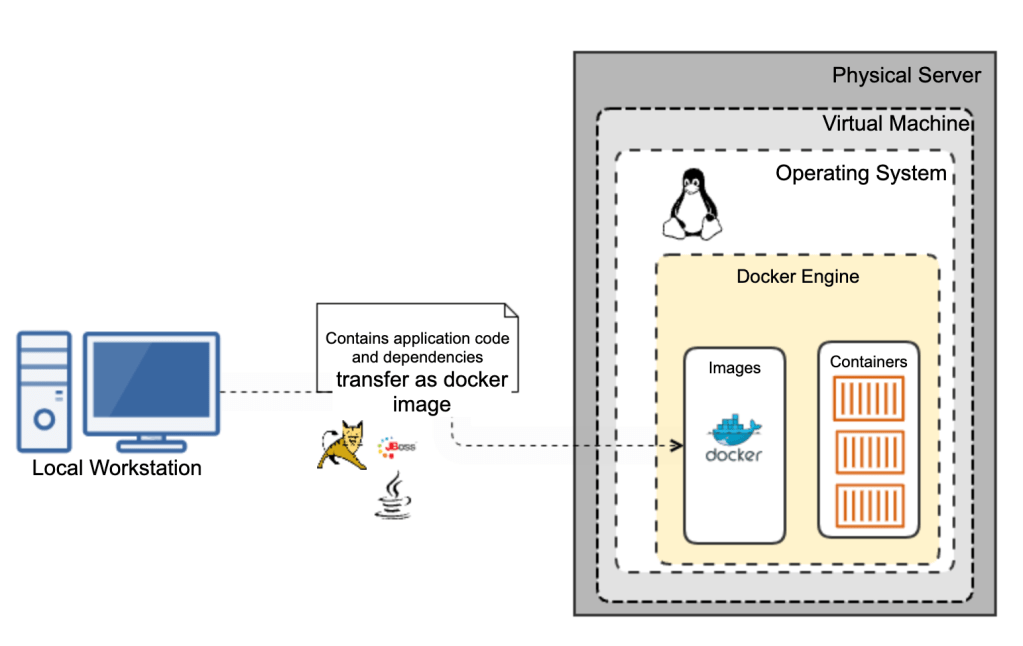
Traditional Java stacks were engineered for applications with long startup times and large memory requirements in a world where the cloud, containers, and Kubernetes did not exist. Java frameworks needed to evolve to meet the needs of this new world.

With AWS lambdas, my experience with Java was not good either. And “cold start” of lambda makes it even worse making it non-ideal for customer facing applications that requires realtime response.

Let’s see how we can overcome this performance bottleneck of Java and create super performant Java lambdas using Quarkus native executables.

What is Quarkus?

Quarkus was created to enable Java developers to create applications for a modern, cloud-native world. Quarkus is a Kubernetes-native Java framework tailored for GraalVM and HotSpot, crafted from best-of-breed Java libraries and standards. The goal is to make Java the leading platform in Kubernetes and serverless environments while offering developers a framework to address a wider range of distributed application architectures.

Say Hello World

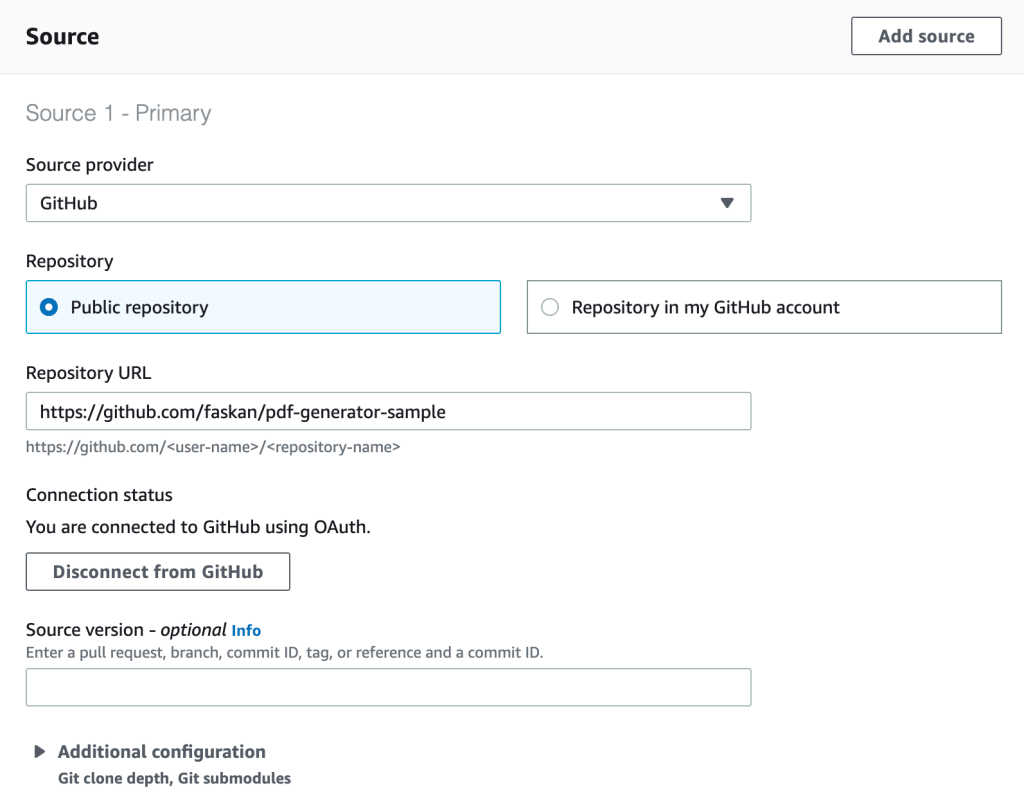
Normally everything goes well if you follow the quarkus getting started guide(We need to take extra care only when adding external dependencies). So for a hello world its pretty straight forward. In my case, I started with the AWS Gateway REST API maven archetype

mvn archetype:generate \
       -DarchetypeGroupId=io.quarkus \
       -DarchetypeArtifactId=quarkus-amazon-lambda-rest-archetype \
       -DarchetypeVersion=2.11.2.Final

Maven archetype generates few sample endpoints as well which is good to do a hello world test deploying to AWS. Build the native binary using below command (note that we need a linux compatible binary to run it as AWS lambda). If you are running on Linux machine with GraalVM installed, -Dquarkus.native.container-build=true can be omitted.

quarkus build --native --no-tests -Dquarkus.native.container-build=true
# The --no-tests flag is required only on Windows and macOS.

Quarkus build generates the sam yaml files as well. We can use the generated sam file to test locally as well as to deploy to AWS. To test locally,

sam local start-api --template target/sam.native.yaml

And deploy to AWS lambda using

sam deploy -t target/sam.native.yaml -g

We are done with the hello world now. Hit the API and feel the magical performance. Even though the first hit took 1 or 2 seconds (which was even worse in normal Java lambda), the subsequent hits were all milliseconds.

A better Use-case

Let’s look at a better use case now for a better evaluation. The use-case that I have chosen here is a simple PDF generation restful API. Normally it takes 3-5 seconds on an average for a plain Java lambda to respond (provided with a memory size of 4 Giga bytes). Cold start makes it even 10 seconds or more to respond for such an API.

The API accepts a JSON request, creates a PDF file using the JSON data and uploads the same file to AWS S3. We’ll make use of a templating engine to apply data on a HTML template and convert it to a PDF file.

Let’s start with the dependencies. Note that not all libraries work out of the box with Native binaries. So my first preference was to find compatible quarkus alternative libraries.

For example, in my plain Java lambda, I was using thymeleaf library for HTML templating. But quarkus has qute library as an alternative. Here is the list of libraries that I have used in my project.

  • io.quarkus:quarkus-resteasy-qute – for HTML templating
  • org.xhtmlrenderer:flying-saucer-pdf – for HTML to pdf conversion. (Does not work out of the box. Needs additional configuration to make it work)
  • io.quarkus:quarkus-awt – AWT extension for quarkus
  • io.quarkiverse.amazonservices:quarkus-amazon-s3 – Provides S3 SDK apis to add generated pdf file into S3 bucket
  • software.amazon.awssdk:url-connection-client – Provides http client for connecting to S3
  • io.quarkus:quarkus-rest-client – Rest client to fetch HTML template from remote URL
  • io.quarkus:quarkus-rest-client – Rest client to fetch HTML template from remote URL
  • io.quarkus:quarkus-rest-client-jackson – Jackson quarkus extension
  • org.projectlombok:lombok – Helper library to reduce boiler plate code (https://projectlombok.org/)

Let’s have a look at the code now. To process the HTML template, use qute engine.

@Inject
Engine engine;

public String parseHtmlTemplate(String templateUrl, Object pdfRequest) throws IOException { 
        String out = new Scanner(new URL(templateUrl).openStream(), "UTF-8").useDelimiter("\\A").next();
        Template template = engine.parse(out);
        return template.data("invoice", pdfRequest).render();
    }

To convert html to pdf

public ByteArrayOutputStream htmlToPdf(String html) throws DocumentException {
        ByteArrayOutputStream outputStream = new ByteArrayOutputStream();
        ITextRenderer renderer = new ITextRenderer();
        renderer.setDocumentFromString(html);
        renderer.layout();
        renderer.createPDF(outputStream);
        return outputStream;
    }

And to save the pdf file to AWS S3

public void saveFile(String fileName, ByteArrayOutputStream outputStream) {
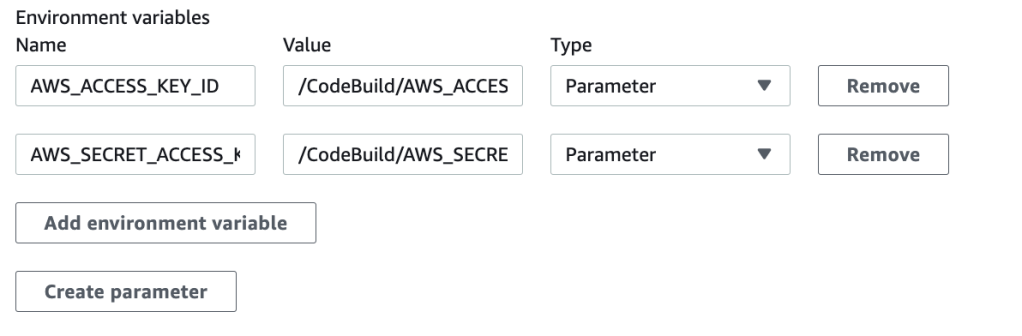
        String awsRegion = Optional.ofNullable(System.getenv("AWS_REGION")).orElse("us-east-1");
        S3Client s3Client = S3Client.builder()
                .region(Region.of(awsRegion))
                .httpClientBuilder(UrlConnectionHttpClient.builder())
                .build();
        s3Client.putObject(PutObjectRequest.builder()
                .bucket(System.getenv("PDF_BUCKET_NAME"))
                .key(fileName)
                .build(), RequestBody.fromBytes(outputStream.toByteArray()));
    }

To save file to S3, first we have to create an S3 bucket in AWS. It is possible to automate the same using sam. To do the same, I have copied the generated sam.*.yaml file to the project root folder. And made couple of modifications to make it work.

Create new S3 bucket in Resources

PdfBucket:
      Type: AWS::S3::Bucket

Correct code uri – CodeUri: target/function.zip

Modify policies to provide S3 access to lambda

        Policies:
          - S3FullAccessPolicy:
              BucketName: !Ref PdfBucket
          - AWSLambdaBasicExecutionRole

Inject bucket name to environment variables. PDF_BUCKET_NAME: !Ref PdfBucket

And name of the S3 bucket created by SAM is injected to Java code as an environment variable.

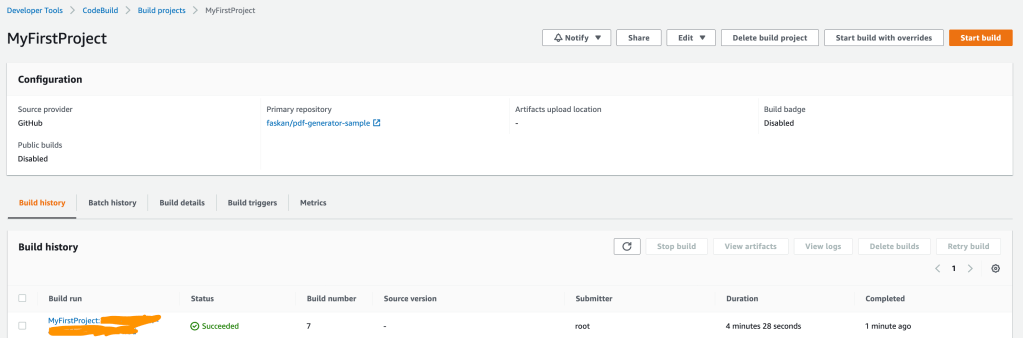
So far everything was good, I deployed my code to AWS and I was expecting it to work. But unfortunately it wasn’t working. To debug it further, I deployed the JVM stack using sam.jvm.yaml and found that it was working in jvm stack.

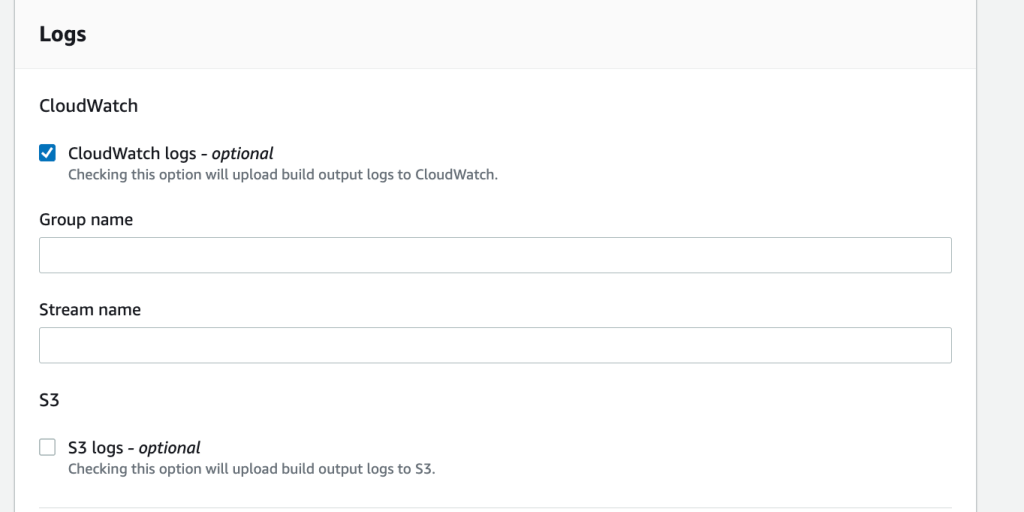
From the native stack’s cloud watch logs, I realised that native binary needs additional configuration to work with flying saucer library. This library expects certain resources which were not available in the native binary. Following these tips from quarkus, I made the below changes in application.properties to include all necessary resources in the native binary.

quarkus.native.additional-build-args=--native-image-info,\
  -H:ResourceConfigurationFiles=resources-config.json,\
  --initialize-at-run-time=sun.lwawt.macosx.CInputMethod\\,\
  com.lowagie.text.pdf.PdfPublicKeySecurityHandler
{
  "resources": [
    {
      "pattern": ".*\\.html$"
    },
    {
      "pattern": ".*\\.conf$"
    },
    {
      "pattern": ".*\\.dtd$"
    },
    {
      "pattern": ".*\\.css$"
    },
    {
      "pattern": ".*\\.afm$"
    }
  ]
}

Although the configuration required to make it work was minimal, the debugging process to identify the problem was time consuming.

Challenges:

  • Beware of libraries that use reflections, class path resource or runtime loading. Native compilation won’t be able to identify all resources needed for runtime.
  • There were instances where in there were no failures in the logs but it simply doesn’t work when we use a non-compatible library.
  • You would need exceptional debugging skills if you don’t find clues in the logs.
  • Native compilation is a time consuming process and so every trials are time consuming

In any case, always refer quarkus native image tips for better debugging.

Even though debugging the native image was a bit difficult, the resulting performance overweighs all those difficulties. The performance of my API has gone from 3-5 seconds to milliseconds. And from more than 10 seconds of cold start to less than 5 seconds which is more than 50% improvement in response time.

Feel free to add your comments and feedback.

References:

Official documentation – https://quarkus.io/guides/amazon-lambda-http